Thursday, 14 July 2016

New Shipment \ :) /

Well its been a few days and i finally shipped a whole bunch of stuff. Only two MG kits at the moment and a ton of extra parts which I'm am wrapped. A lot of the extra parts will be going to my current Zaku build an any other future Master Grade builds.


I didn't realize how many option kits and add-on parts I had bought. 


All the kotobukiya option kits most of them are for weapons or will modified into other weapons...or are attachments to modified weapons.


I have been loving the HiQ parts decals they are really sturdy and nice to put on. But this will be my first time with Wave decals so hopefully they are no different. And I'm liking the little animal markings too.


i am looking forward to building that Gouf's inner frame because from the reviews I have seen it is a really good kit (it uses some parts from the Zaku 2.0 frame as well). And of course our every elusive White Ogre which I will build last and with no modifications.


Lastly some builders parts add-ons. The mono eyes look really cool they just need a abit of paint on the housing of them and the inside can have maybe a bit of silver or white to make the lens more visible.


That's it for today but I guess soon I will have a post up about my progress :)


Tuesday, 28 June 2016

More Zaku outer armour

I couldn't decide whether to get back into my Zaku or my reZEL so I choose Zaku. I started on some of the other parts that I hadn't got around to doing like the rest of the armour and the shoulder shield. Also a bit of planning on what parts I am going to top coat at the end of it. 
I am still astounded by this kit just the level of details on the inner frame and the the armour looks good but its nice that Bandai kind of left the surface of the armour kind of blank it just give me a clean slate to put the panel lines and decals that i want to do.


I am really loving the look of it with the shotgun, mostly because I have never really been a fan of the Zaku machine gun. But I might end up taking the stock off or at least give the option of having either.


I quite like either way to be honest it looks tactical with the stock on but also looks like it is more Zeon without the stock.
My plan was originally to modify an MG Zaku F2 (which is on back-order at the moment) as sort of a Earth Zeon Remnants unit with a different weapons load out and some modifications to a few parts of the body but I'm thinking I could flag the F2 and just do some of those same modifications to this Zaku 2.0 instead.
I was looking at maybe keeping the shotgun and adding a 2 tube arm mounted rocket launcher from the Kotobukiya MSG machine gun/missile launcher set. Similar to the big guns on the Zaku Cannon. And possibly changing a few parts like the leg power pipes to maybe a mesh type of material to sort of simulate that the machine had been modified over the years to accommodate for urban warfare and weight reduction.

Any way I will continue on getting these armour parts built in the mean time just to finish the build phase off.


Sunday, 26 June 2016

Zaku outer armor progress

Well I went pretty hard on the weekend I was up till 3am in Friday night just trying to get this reZEL inner frame completed which I will detail in another post (and was not completed haha) But anyway we are here to talk about Zakus. 
Saturday I ended up wanting a break so I went back to the Zaku in the end and started building some of the armour for it because I will need to have a look so I can plan any custom panel lines and any decals after that.


I was cringing a little bit when i was putting the armour on just because I has covering up that inner frame that is really detailed. I also painted up the thruster nozzles on the backpack with my silver gundam marker (my friend Jairus did it on his mega size Zaku and I liked the look of it) I may end up doing the inside of the thruster with a gold marker at a later date, I just ordered one today. 

Testing up the armour parts I think I will file back a few of the joins to show the inner frame underneath just on the biceps and the thigh joins.


Bit of a test with some custom MG weapons. I just wanted to see how they would look and fit up for later.

Anyway next post will be on the reZEL :)


Wednesday, 22 June 2016

Custom weapons

So its been a few days since I last posted but this is a little side project i have been really excited about. And now that I have started a few of these Master grade kits I have found a lot of the weapons i have bought that were just in my parts box are able to be used now. I thought that they would go well with the HG kits I have but only a few seems to have worked well the rest look too over-sized, until now :)

So I bought the Kotobukiya MSG pistol kit for my Denial Gundam form Build fighters try I was going for a gunslinger type but it didn't work out that way in the end. But I found that the small Sub machine gun looked a little familiar and then it clicked, If I add a few parts on I would have


Before


After 

For those that don't recognize it, its a Vector. And all the parts on there are easily obtainable. The fore-grip is from a piece of runner with a armour collar from Wave (which is about $1.50 NZD). The mag is made from the two label parts of a runner that were just glued together then filed and sanded then glued to the bottom of the gun (I wish I had made it a detachable mag). And the stock is made from a piece from one of the sets you get int he customize campaign parts and the corner part of a runner. 
This was going to put in the hands of my REzel. Oh and it also comes with a small holster too.


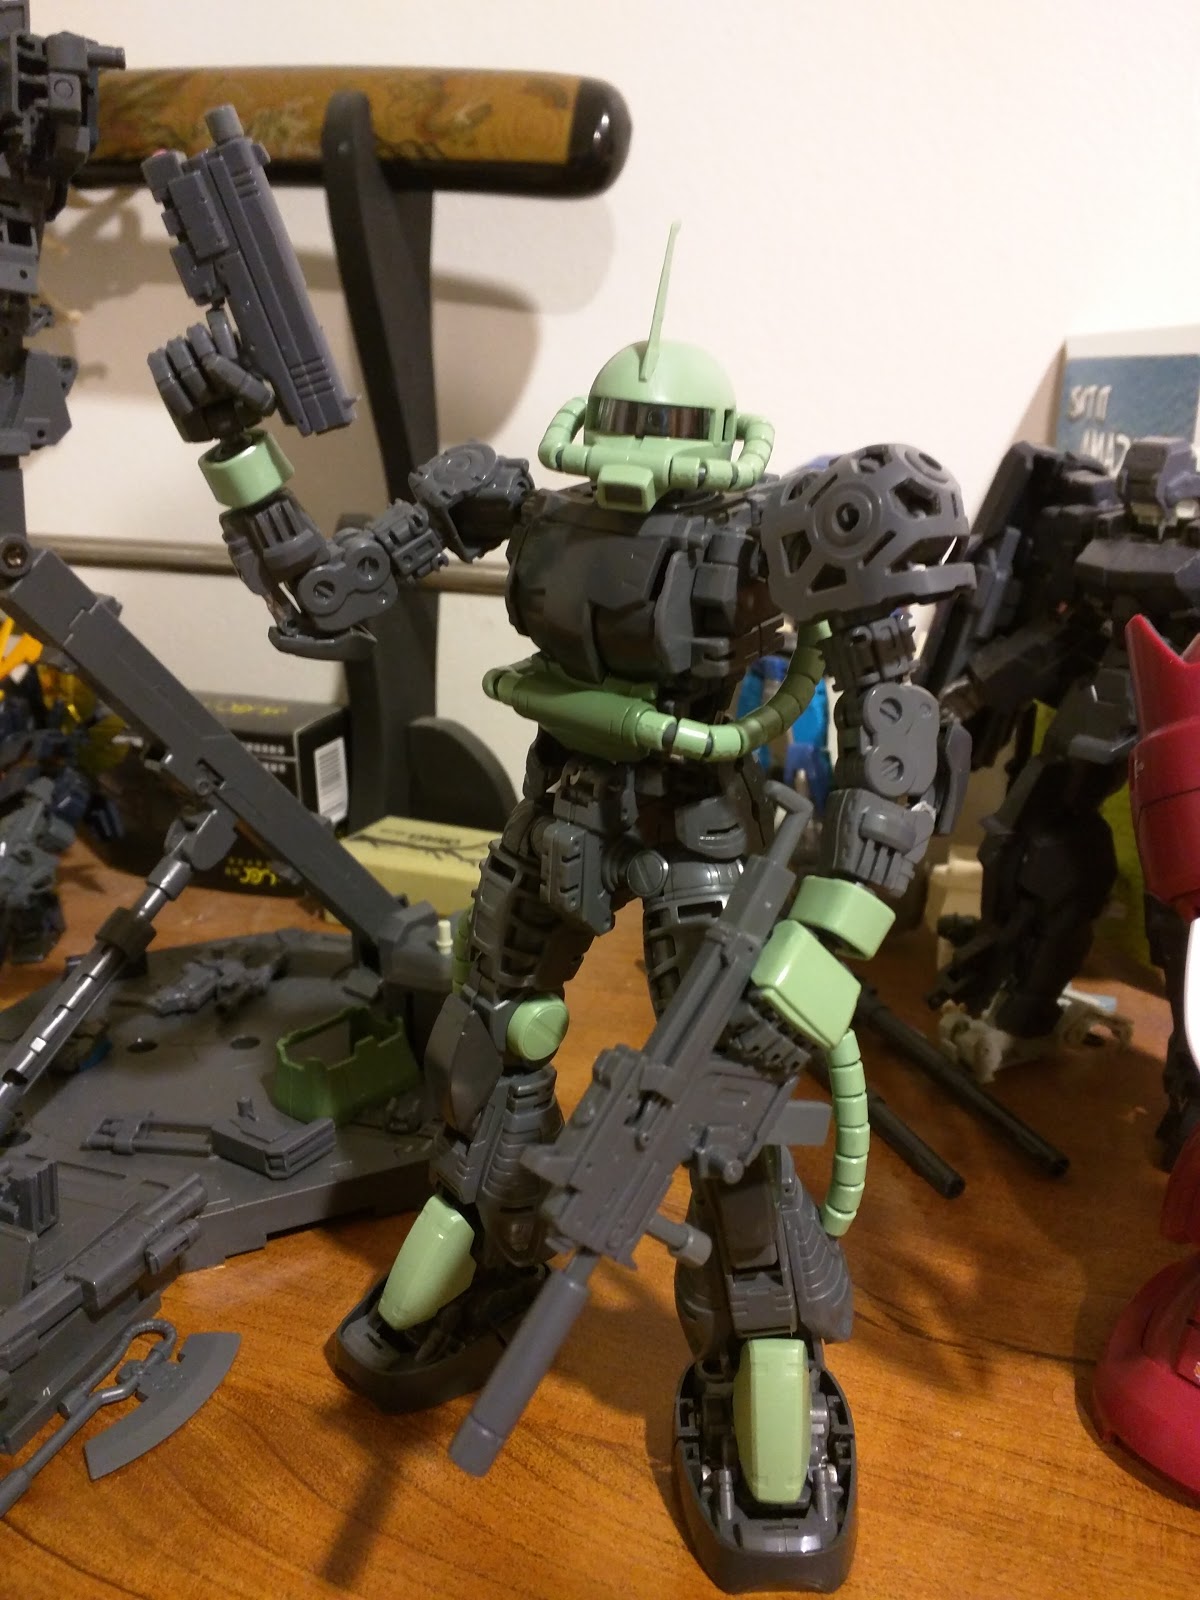
Next up is a hunting pistol that I saw a picture on the internet. i wanted it to give it to my White ogre when I get it shipped as i am not a real big fan of the Zaku machine gun so its quite cool to have other weapons types


It still needs a bit of work like on the mold flashing just to clean it up. The scope I got from the MSG shotgun and the mount is made from one of the revolvers holsters that was just trimmed down in a few places. I had a go at putting a tab hole in the handle for Master Grade kits but I have to get an actual modelling chisel to do that.


I don't think it fits not too bad but the handle is a little small which I could probably extend a little bit out. 

Next time I should have an automatic pistol finished and my plans for a bull-pup type SMG out of more MSG weapons kits.

See you next post :)


Monday, 20 June 2016

Zaku Inner Frame Finished

Last night wasn't too productive mostly because Game of Thrones was on so had to watch that. But in the end I completed the inner frame of my Zaku 2.0. 
I love the way this frame moves and all the articulation it has I a looking forward to customizing the armour and weapons to go with it.


The mechanics on this is great and I really need to get some more pictures on the small but awesome detailing on it. Its almost a shame to cover it up with with the armour. I might end up having to pose it with just the one side having the armour fitted and the other side with the exposed inner frame.


The articulation is crazy as well like 180 degrees on the arms elbows and knees the wrist has 2 places it can move s thats going to work out really good for me in the long run with the custom weapons I am looking to build for it and the White Ogre (more on that in a week of two).  The feet have a ton of points of articulation and make the kit quite sturdy in different poses too (even though I built one of the large action bases for it)


Taking an arrow to the knee :). I was showing my Mrs the prowess of the mighty Zaku's articulation. And we end up doing this which I thought was pretty cool and fun to do :) 


I have a ton of Kotobukiya weapons left over from purchases I have made over the years and I have been itching to use this hydraulic fist on a kit. The HG kits but it just looked too over-sized then I put it on this kit I was really surprised how well they went with the Zaku.

I might start that Rezel inner frame tonight just to have a break from this one and it will be nice to pose off the Zaku kit before I begin working on armour.

Until next time :)


Sunday, 19 June 2016

Inner frame weekend

Well i'm back after a hugely productive weekend. I had my friend's leaving BYO on Saturday night so that was a really good time and he got pretty toasted which was a laugh in the end. Saturday morning me and the Mrs did some of our wedding DIY so that was quite cool and she got some carpentry skills at the same time. But on the Gundam front well I was really enjoying this Zaku 2.0 build and I was about halfway through the inner frame of the kit. to my surprise this level of detail is off the charts. I really don't want to cover it up just because of the mechanical detailing Bandai has put into this.


By Sunday night I was grasping for time to get at least the inner frame completed with a few little extra bits. But in the end I have just a couple more things to do.
I also went through and painted the pistons/actuators in a silver Gundam marker i do like it because the silver shows up quite well, then I went over that in a black wash just to get in any crevices. But the black wash dulled the silver down abit although it gave the silver a kind of greasy look so I was quite happy about that. I I want to get a gold marker for the White Ogre so that I can do silver and gold pistons I think that will look quite cool.


The detailing of the foot is really great and I love how the foot pistons are visible when the toe part bends. there are a lot of small pieces in the foot but it holds quite sturdy.


I have only had a small play with the flexibility and articulation of the frame so not a lot playtime with this to see what posses I can get it into but I have heard it can be put in most posses that the human body can do which is pretty damn good.

I also went tor the alternate commander fin on top of the head it just looks the best in my opinion I am considering modifying in the alternate "bald" head armour to something like a Roman crest just because I quite like mash ups or where a pilot has customized their machine a lot to suit their personal flair. 

Oh and a final note don't follow the instructions when it says to cut the ball looking part from the nose pipe sections. I didn't the first one and just didn't sit in securely in snout intake. I will put up a few pictures up in my next post.

Until next time :)


Tuesday, 14 June 2016

WIP Zaku II 2.0 J type

Back into it again this week. Well not the Z'Gok anyway which I should be getting back into so I can get it ready for a top coat.
But I did start the Zaku 2.0 that I got a coupe of days ago. Initially I wasn't as impressed about the unboxing as I was with the Z'Gok. It just seemed like I was opening a standard HG kit whereas the Z'Gok had a cool cover thing with a photo over the runners so it felt more satisfying. But I guess the Z'Gok was released back in '95 and I think Bandai probably wanted the kit itself to do the talking because what a kit it has turned out to be so far and I'm only doing the torso inner frame.


This was the progress I got up to on the night the package came in. The cockpit is quite detailed and the inner frame has some nice mechanical work on it too.


And you even get a little reactor for the torso that doubles as a connection to the waist part this was really awesome.


Last night I started doing the piping around the waist which I thought was going to take me ages but it was mostly painless. Apart from actually sliding the armour collars on to the flexible cable the wouldn't slide off because they were too tight. I had to snip the end of the runner off then take the collar off and put it on the pipe.


But otherwise that that he kit has been pretty awesome to build. I just have to figure out how I am going to be able to put the pink clear lenses onto the monoeye.
Which I will probably will do tomorrow night :) I have to complete the Z'Gok first haha